Showing posts with label Notizbuch. Show all posts
Sunday, March 15, 2015
Post-it Kühlschrankmagnet
Heute hab ich eine kleine Anleitung für Euch. Es ist ein Post-It Kühlschrankmagnet. Verwendet hab ich einen kleinen Post-it Block der Größe 5,5cm x 5cm. Alles was Ihr benötigt ist ein Stück Cardstock mit den Maßen 2 1/4inch x 6inch (mein Falzbrett hat leider nur Inch) und zwei Designpapiere mit einer Größe von 5,5cm x 5,5cm.
I have a tutorial for you today. It's a post-it magnet. I used a post-it pad that measures 2 1/4" x 5". All you need is a piece of cardstock that measures 2 1/4" x 6" and two design papers (2 1/8" 2 1/8").
Auf der langen Seite falzt Ihr bei 2 1/4", 2 3/4", 5" und 5 1/2".
Scor on the long side at: 2 1/4", 2 3/4", 5" and 5 1/2".
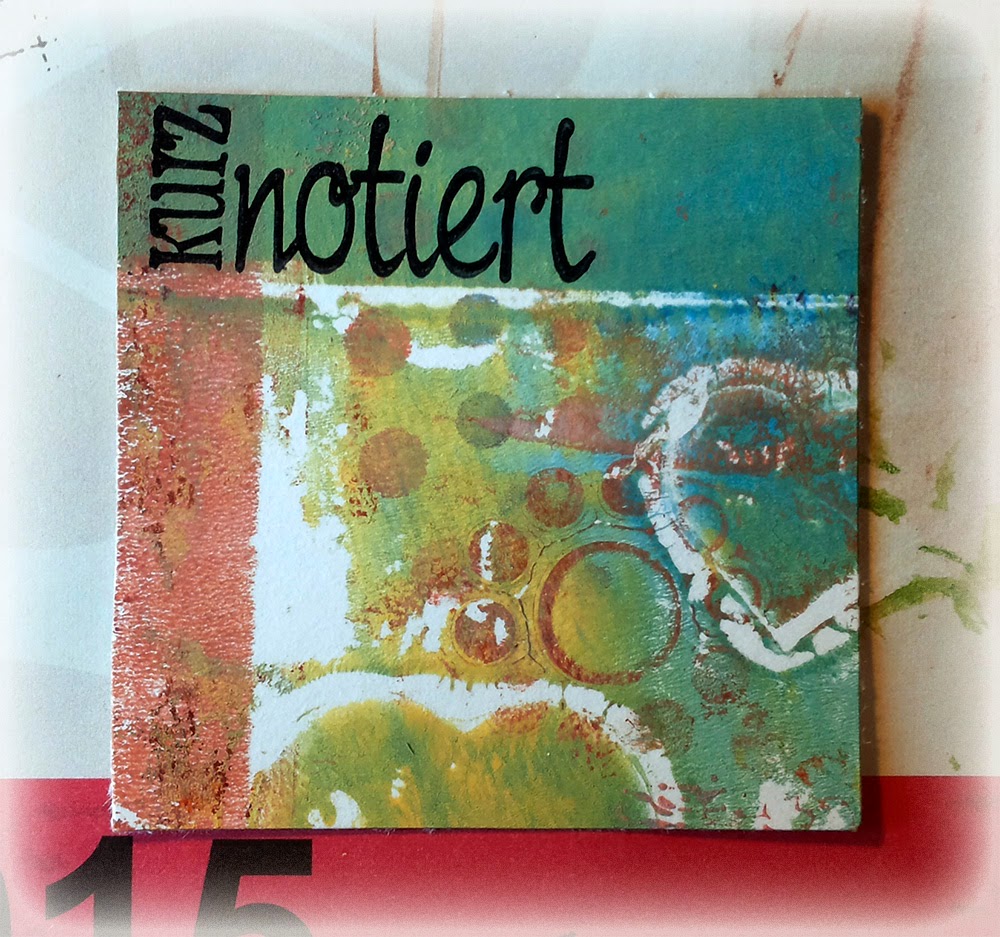
Für mein Cover hab ich ein Papier mit der Gelli Plate gestaltet. Die Ränder von meinem Notizbüchlein sowie dem Post-it Block hab ich mit Distress Ink Walnut Stain gewischt.
I created a paper with my gelli plate for the cover. I distressed the edges of the cardstock and of my post-it pad with Distress Ink Walnut Stain.
Auf die schmale Seite unten klebe ich einen kleinen Magneten. Den zweiten Magneten klebe ich auf die Vorderseite unter mein Designpapier. Dazu falte ich meinen Block zusammen und lasse den zweiten Magneten an seinen Platz springen. Anschließend klebe ich Ihn mit Tesa fest und das Designpapier drüber.
I adhered a magnet on the bottom flap. the second magnet is under the designpapier on the front cover.
Jetzt muss nur noch verziert werden! Die Roll-Up Roses von Noor! Design sind meine absoluten Favouriten! Diesmal hab ich sie aus rotem Vellum gestanzt. Auf die Innenseite des Covers hab ich auch noch ein Designpapier geklebt.
Now I embellishe the cover with some Roll-Up Roses and Leaves from Noor! Design. I cut the flowers out of red vellum. I also add a design paper on the inside of my cover.
Auf die Ränder des Block hab ich noch das Wort "Notizen" gestempelt. Das ist ein bisschen kniffelig, aber es hat ganz gut gekappt. Damit der Block auch am Kühlschrank hält müsst Ihr auf der Rückseite noch ein/zwei stärkere Magneten anbringen.
I stamped also on the edges of the notepad. That's a little bit tricky, but it worked well. To finish it up you need to adhere one or two stronger magnets on the backside.
Material aus dem Noor! Design Shop:
Monday, March 2, 2015
Notepad for my hubby with DCWV
Ich hübsche sehr gern Kellnerblöcke auf und dieses mal hab ich einen für meinen Göga gemacht. Der "Out in the Wild" Stack von DCWV passt perfekt zum Thema.
I love pimping notepads and this time I created one for my hubby! The "Out in the Wild" Paper Stack by DCWV is perfect for a male creation.
Ich hab eine schwarze A7 Karte von DCWV als basis verwendet. Die Ränder hab ich mit der Nähmaschine genäht. Auf der Innenseite sind zwei Einsteckfächer für Visitenkarten.
I used a A7 Black card from DCWV for the base. I sewed it with my sewing machine. On the inside are two little pockets for some business cards.
I used the following products from DCWV:
A7 Black cards with envelopes
DCWV 12" x 12" Out in the Wild Stack
Other supplies:
Scor tape
I love pimping notepads and this time I created one for my hubby! The "Out in the Wild" Paper Stack by DCWV is perfect for a male creation.
Ich hab eine schwarze A7 Karte von DCWV als basis verwendet. Die Ränder hab ich mit der Nähmaschine genäht. Auf der Innenseite sind zwei Einsteckfächer für Visitenkarten.
I used a A7 Black card from DCWV for the base. I sewed it with my sewing machine. On the inside are two little pockets for some business cards.
I used the following products from DCWV:
A7 Black cards with envelopes
DCWV 12" x 12" Out in the Wild Stack
Other supplies:
Scor tape
Saturday, February 21, 2015
Blog Planner
Um den Überblick über meine Blogposts zu behalten hab ich mir einen" Blog Planner" gewerkelt. Die Papiere sind von BoBunny.
To not lose the overview of my upcoming blog posts I made myself a "Blog Planner". The paper collection is from BoBunny.
Eine Anleitung zu dem tollen Stifte Etui findet Ihr auf dem YouTube Channel von Schnipsel und mehr.
You'll find a tutorial for the pen case on the "Schnipsel und mehr" YouTube Channel.
Auf diese Seite ist Platz für einen Monatskalender.
On this site is room for a monthly canlendar.
To not lose the overview of my upcoming blog posts I made myself a "Blog Planner". The paper collection is from BoBunny.
Eine Anleitung zu dem tollen Stifte Etui findet Ihr auf dem YouTube Channel von Schnipsel und mehr.
You'll find a tutorial for the pen case on the "Schnipsel und mehr" YouTube Channel.
On this site is room for a monthly canlendar.
Wednesday, February 11, 2015
Eine magnetische Einkaufsliste...
Für meine Einkaufsliste hab ich mal wieder ein neues magnetisches Board für den Kühlschrank gemacht. Als Basis hab ich ein Stück alten Karton verwendet. Verziert hab ich mit vielen Blumen und Blättern verschiedener Hersteller (Die-Namites, MFT, Marianne Design, Noor! Design, Spellbinders)
I created a new board for my shopping list with some old cardboard. I add some magnets to the back, so I could hang it onto the fridge. I embellished it with tons of flowers. They are dies from different manufacturers (Die-Namites, MFT, Marianne Design, Noor! Design, Spellbinders).
Ich möchte Euch zeigen wie ich aus dem hübschen Noor! Design Schmetterling ein faux Metall Embellishment gemacht hab. Alles was Ihr braucht ist etwas Fran-tage Aged Taupe Embossingenamel. Den Schmetterling drückt Ihr zuerst einmal fest auf Euer Embossingkissen. Anschließend kommt die erste Schicht Fran-Tage Aged Taupe drüber. Das Häufchen Pulver auf Eurer Unterlage lasst Ihr bitte liegen, das braucht Ihr gleich noch. Die erste Fran-tage Schicht wird geschmolzen und sofort im Anschluss taucht Ihr den Schmetterling mit dem noch heißen Enamel wieder in Euer Pulver. Diese zweite Schicht wird natürlich wieder geschmolzen.
I like to show you today, how I created this lovely faux metall butterfly using some Fran-tage Aged Taupe embossing enamel. First of all cover your butterfly with embossing ink and dip it into your enamel. It's important to leave your enamel on your piece of scrap paper, as you will need it again soon. After melting the powder on you butterfly you dip it in your enamel immediately, so the powder sticks to it again. Melt the second layer and voilá:
Solltet Ihr mit dem Ergebnis nicht zufrieden sein, dann könnt ihr selbstverständlich noch eine dritte Schicht Fran-tage auftragen.
If you need more "metall" you can do this a third time of course!
Material aus dem Cards und More Shop:
I created a new board for my shopping list with some old cardboard. I add some magnets to the back, so I could hang it onto the fridge. I embellished it with tons of flowers. They are dies from different manufacturers (Die-Namites, MFT, Marianne Design, Noor! Design, Spellbinders).
Ich möchte Euch zeigen wie ich aus dem hübschen Noor! Design Schmetterling ein faux Metall Embellishment gemacht hab. Alles was Ihr braucht ist etwas Fran-tage Aged Taupe Embossingenamel. Den Schmetterling drückt Ihr zuerst einmal fest auf Euer Embossingkissen. Anschließend kommt die erste Schicht Fran-Tage Aged Taupe drüber. Das Häufchen Pulver auf Eurer Unterlage lasst Ihr bitte liegen, das braucht Ihr gleich noch. Die erste Fran-tage Schicht wird geschmolzen und sofort im Anschluss taucht Ihr den Schmetterling mit dem noch heißen Enamel wieder in Euer Pulver. Diese zweite Schicht wird natürlich wieder geschmolzen.
I like to show you today, how I created this lovely faux metall butterfly using some Fran-tage Aged Taupe embossing enamel. First of all cover your butterfly with embossing ink and dip it into your enamel. It's important to leave your enamel on your piece of scrap paper, as you will need it again soon. After melting the powder on you butterfly you dip it in your enamel immediately, so the powder sticks to it again. Melt the second layer and voilá:
Solltet Ihr mit dem Ergebnis nicht zufrieden sein, dann könnt ihr selbstverständlich noch eine dritte Schicht Fran-tage auftragen.
If you need more "metall" you can do this a third time of course!
Material aus dem Cards und More Shop:
Subscribe to:
Posts (Atom)


