Hallo alle zusammen.
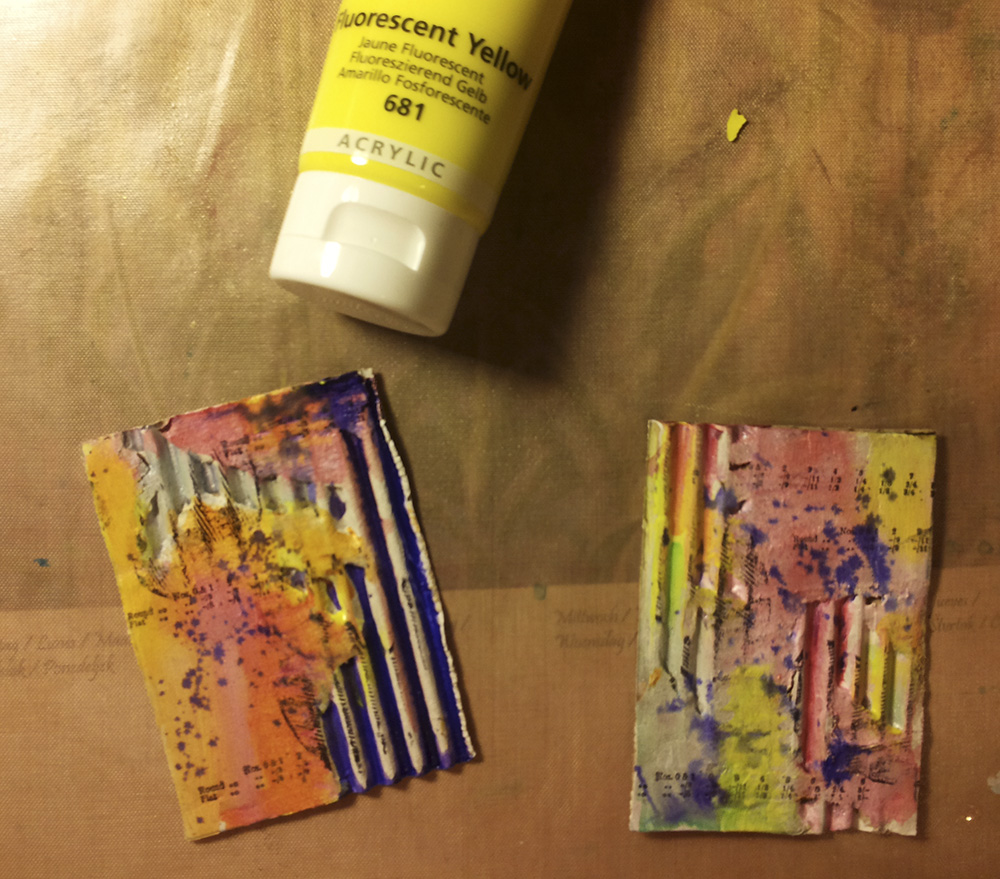
Heute möchte ich Euch eine Anleitung für diese Artist Trading Cards geben. Als Basis habe ich einfach normalen Karton verwendet.
Hi my dear Rubber Dance friends.
Today I'll share two mixed media Artist Trading Cards (ATC). My base is some simple card board cut to the ATC standard size (2.5" x 3.5").
Das braucht Ihr:
What you need:
Cardboard
Gesso
Twinkling H2Os or other shimmering colors
Embossing powder gold & black
Permanent Black ink (e.g. Archival Ink)
Flourescent Acrylic colors (yellow, pink)
Black acrylic color for some splatters
Gelato Black Licorice
Heart stencil (Tim Holtz)
Texture Paste gold (Creative Medium metallic gold)
Distress Inks (dusty concord, mustard seed, barn door, chipped saphire)
Irresistible Pico Embellisher (white, electric purple)
Rubber Dance Alphabet Uno
Rubber Dance Artist Plate
Hier sind die einzelnen Arbeitsschritte:
Here are the step by step instructions:
1. Schneidet Euch zwei Karten aus dem Karton, feuchtet sie etwas an um teile der oberen Schicht zu entfernen, grundiert sie mit Gesso und gebt Wasser zu den Twinkling H2Os.
Cut two cards from card board. Wet the surface to remove parts of it. Prime them with gesso. Add water to the Twinkling H2Os while the cards dry.
2. Der Hintergrund wird mit den Twinkling H2Os gestaltet. Nach Lust und Laune tragt Ihr
einfach Farbe auf...
Color the background with Twinklings H2Os. No need to do something special. Just add some color here and there...
3. Um die Trocknungszeit zu nutzen könnt Ihr schon mal die Motive vorbereiten. Den Pinselstempel habe ich einmal mit goldenem Embossing Pulver gestempelt und einmal in schwarz (die sind auf dem Photo nicht abgebildet). Die Buchstaben sind mit schwarzem Pulver embossed.
While you are waiting for the cards to dry, you can prepare your embellishments. You only see the gold embossed brushes on the photo. I also stamped them with black archival ink. The letters are embossed with black powder.
4. Für etwas mehr Textur im Hintergrund stempel ich einige Stempel aus dem "Artist Plate" Set.
Use the stamp with the brush sizes and the palette stamp to add more interest to the background.
5. Mit Neon-Acrylfarbe kommt eine weitere Schicht auf dei Kärtchen. Ich trage die Farbe mit dem Finger auf.
Use fluorescent acrylic colors for your next layer. I apply the colors with my fingers.
6.Nun kommen ein paar schwarze Sprizer hinzu. Den Rand schwärze ich mit einem schwarzen Gelato.
Add some black splatters and paint the border black with the Gelato pen.
7. Mit der Herz Schablone von Tim Holtz und dem gold metallic Creative Medium kommt etwas Textur hinzu.
Use the heart stencil together with the metallic gold Creative Medium to add more texture.
8. Während die Hintergründe trocknen könnt Ihr die Embellishments fertigstellen. Hierzu werden die schwarzen und goldenen Pinselabdrücke kombiniert und alle mit Distress Inks koloriert.
While everything dries you can finish your embellishments. Combine the black and gold brushes and color everything with Distress Inks.
9. Zum Schluss kommen die Farbtuben und Pinsel zusammen mit den texten auf die Kärtchen. Etwas Pepp bekommt man mit den Pico Embellishern.
Finally adhere the embellishments and set some highlights with the Pico Embellishers. The "make art" sentiment is also embossed with black powder and colored with Distress Ink.
Stamp sets from Rubber Dance:
Artist Plate
Alphabet Uno
Ihr bekommt 15% Rabatt bei Eurer nächsten Bestellung im Rubber Dance Online Store mit dem Code "susanne2016".
You will get 15% discount on your next order in the Rubber Dance Online Store when you enter the coupon code "susanne2016" during checkout.
 www.rubberdance.com