Hi my dear mixed media friends.
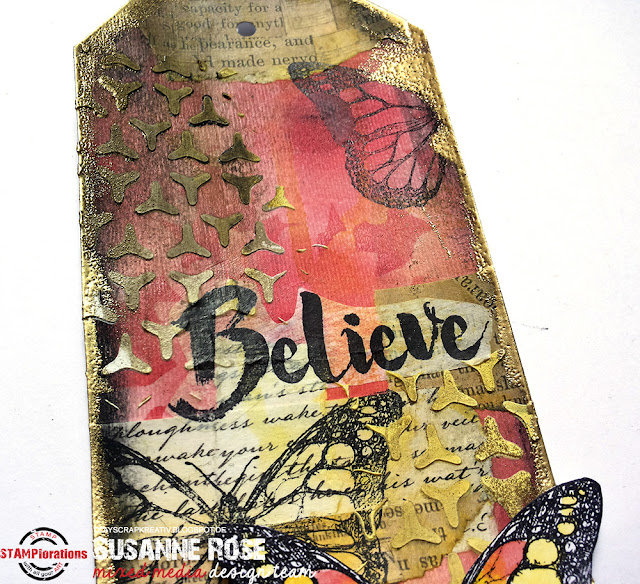
I'd like to share a butterfly tag today. I LOVE creating tags because they are so versatile to use later. I prefer using them in my planner, on gifts or in my art journal.
Here are the step by step instructions:
1. I create a background using VersaMark ink through the "Daisy Dance" stencil and adding PanPastels. The color pigments with stick to the ink and you'll end up will this lovely pattern.
2. To seal the PanPastels I use my gelli plate together with some Gel Medium. Add a thin layer of Gel to the Plate and press the tag down.
3. Add some patterned paper scraps with Gel Medium.
4. Stamp the butterfly from the "Blossom like a Butterfly" set with waterproof black ink.
5. Add some shading with a watercolor crayon. I love to use Neocolor II crayons.
6. I use the "Lattice Y" stencil to add some texture with modeling paste.
7. Add some yellow with Distress Ink "Mustard Seed". I press the ink pad onto my craft mat and use water plus a brush to add it to my tag.
8. I used some tissue paper and stamp the "Believe" with waterproof black ink.
I cut it out and add it with Gel Medium.
9. I use the chocolate Gelato to add some more shading and WOW! Metallic Gold Powder on the edges.
10. Finally I adhere a butterfly (it's colored with Distress Inks) on top.
Thank you for stopping by today,
Susanne.
Stencils from STAMPlorations:
Lattice Y
Daisy Dance
Stamps from ARTplorations:
Blossom like a Butterfly
Believe


Gorgeous, just a pity you covered up the initial background :) .. LOVE those flowers.
ReplyDeleteAbsolutely stunning, Susanne. Wonderful step-by-step, too.
ReplyDelete